
Mobile House မန္ဘာ မ်ား ေက်းဇူး ၿပဳ ၿပီး www.mobilehouse.co.nr မွ တိုက္ ရိုက္ ၀င္ေပး ပါ ရန္ ႏွင္႔ အသစ္ တင္ သမွ် ကို သိရွိ ေစရန္
https://www.facebook.com/MobileHouseServiceCentre
မွာ Like လုပ္ ေပး ၾက ပါ ....

Sunday, June 3, 2012

GSM Multi HUB v.0.5.1

GSM Multi HUB v.0.5.1


LG 3G
- CU320, CU400, CU405, CU500, CU500V, KU380, KU990,
- MU500, MU550, TU500, TU550, U990, AND MORE...
- Unlock
- Change IMEI
- Change Bluetooth Address
- Use original USB Cable

Motorola P2k
- Read Info
- Master Reset
- Master Clear
- Reset User Code
- Restart

Nokia
- USB Mode
-- Read Info
--- Read Security Code
--- Read MMC Password
-PM & RPL Tool
-- Create RPL from PM

Samsung
- Read Info
- Reset Eeprom
- Use original USB Cable

Sony Ericsson
- Read Info
- Read Memory Status
- Master Reset
- Ringer Control
- SMS Function
-- Send
-- Receive

Unlock Code Generators
1. Alcatel
-- Mandarina Duck, C825, C820, V770
-- C700, C701, C707, C717, V670, Playboy, ELLE N3
-- S215, S218, S319, S320, S321
-- S520, Miss Sixty

2. Huawei
-- E156, E155, E1550, E1552, E156G, E160, E160G, E161, E166, E169, E169G,
E170, E172, E176, E1762, E180, E182E, E196, E226, E270, E271, E272, E510,
E612, E618, E620, E630, E630+, E660, E660A, E800, E870, E880, EG162, E880,
EG162, EG162G, EG602, EG602G
-- Unlock code Calculator
--- Direct Unlocker/Reader
--- Relock modem
--- Counter Reset

3. Vodafone Modem
-- K2540, K3515, K3520, K3565, K3520, K3565
-- Unlock code Calculator
--- Direct Unlocker/Reader
--- Relock modem
--- Counter Reset

4. LG
-- 510, 520, 510w Type 1, 510w Type 2, 7010, 7020, B1200, M1200, B1300, 1300,
G510, KG110, W3000

5. VK
-- VKi230, VKi200, VK200

6. ZTE
-- SAGE, SFR 114, SFR 231, SFR 232, SFR 241, SFR 251, SFR 341, SFR 342, SFR 343,
SFR Messenger Edition 251, N281, Orange Miami, Orange Rio, Orange Rome, Orange Vegas,
Vodafone Indie, ZTE A261+, ZTE X670, ZTE X760, ZTE F100, ZTE X761, ZTE X960, ZTE X990,
ZTE GX670, ZTE GX760, ZTE GX761, ZTE GR230, T-Mobile Vairy Touch, TMN 5000


Download from HERE
 zip password    =    sola Christi
ဆက္ဖတ္ရန္>>>

UNIVERSAL GINGERBREAD ROOT SAMSUNG GALAXY

UNIVERSAL GINGERBREAD ROOT SAMSUNG GALAXY GT-S5570, GT-S5570B, GT-S5570I, GT-S5570L, GT-S5660, GT-S5660M, GT-S5660L, GT-S5660V, SHW-M290K (Korean GIO), GT-S5670, GT-S5670B, GT-S5670L, GT-S5830, GT-S5830B, GT-S5830C ,GT-S5830D, GT-S5830i, GT-S5830L, GT-S5830M, GT-B7510, GT-B7510B, GT-B7510L, GT-B7800, GT-B7800L, GT-B5510, GT-B5510B, GT-B5510L, GT-B5512, GT-B5512B, GT-S6102, GT-S5300, GT-S5360, GT-S5360L, GT-S5360T, GT-S5363, GT-S5369, GT-S5690, GT-S5690L, GT-I8150, GT-I8150B, GT-I5510, GT-I5510B, GT-I5510L, GT-I5510M, GT-I5510T.


This is only for the people that they are using Gingerbread and can't root their phone with SuperOneClick. You can root your phone with universal_gb_root_v19.zip file for your phone model.


Question: How do I Root Gingerbread on my phone?

Answer:

- First enable Unknown sources on your phone (Settings -> Applications -> Unknown sources)

- Download the universal_gb_root_v19.zip file and put in your SD card.

* How do I transfer universal_gb_root_v19.zip on my SD card?

(You can tranfer the universal_gb_root_v19.zip to your phone via Wifi, Bluetooth, SD micro Adapter or USB cable. To transfer it via USB cable you need first to download KIES from the offical Samsung Web Site and after installing restart your PC so the USB drivers can be recognized properly.Enable USB debugging on your phone, Settings -> Applications -> Development -> USB debugging. Plug in the USB cable and enable the connection on you mobile phone like the picture in the bottom. After couple of seconds your SD card will be showed on your PC like Removable disk. Copy universal_gb_root_v19.zip to your SD card.)


- After transferring your file on your phone disable the USB by pressing "Disconnect storage from PC" after that remove the USB cable and turn off your phone "Power off".

[Entering recovery mode on 551, Pro]

- Make shure you start the phone like this : Long press and hold the (T Button) + (Power Button)


[Entering recovery mode on Ace, Gio, Fit, Mini, Pop]

- Make shure you start the phone like this : Long press and hold the (Power Button) + (Home Button)


[Entering recovery mode on Ace GT-S5830i, Xcover, Young, Y-Duos, Y-Pro, Y-Pro Duos, M-Pro]

- Make shure you start the phone like this : Long press and hold the (Volume up Button) + (Home Button) + (Power button)


- After couple of seconds you will see your phone booting in recovery mode

- Move in the menu with the Volume - Volume + to scroll up and down and choose "apply update from sdcard" with the Home button and choose the universal_gb_root_v19.zip and press once again the Home button to apply it.


- You will see a message "Install form sdcard complete".

- Then press on the "reboot system now"

- When you open SuperSU it will ask you to upgrade the SU binary just press continue your phone will reboot once and you are done!

Download link for Universal Gingerbread Root (by Dani) :


What's new in this version:

- SuperSU
- SuperSU binary v0.88
- BusyBox binary v1.19.4 (new)

Important: Root and Unroot method is designed to work in recovery mode on Stock ROM's. CWM Recovery and Custom ROM's are not supported! And never try to unroot your phone when you are using Custom rom!

---------------------------------------------------------------------------------------------------


HOW CAN I UNROOT MY PHONE?

- First thing you need to remove all the applications that they are depended from root, after that open SuperSU -> Settings -> Full Unroot and press Continue. Your phone will reboot once, after rebooting enter again in Recovery mode and use the universal_gb_unroot_v3.zip to delete all the traces remaining. If you were having Superuser app (the older one) just run in Recovery mode the universal_gb_unroot_v3.zip.


You can download the UNROOT from here:

What's new in this version:

- Deleting all traces of Superuser
- Deleting all traces of Suhax
- Deleting all traces of Busybox and Busyboxpro (and all applets created in xbin that they are symlinked cusing sometimes Busybox to fail of uninstalling them so that problem is solved i add them all to be deleted. )
- Deleting all traces of Superoneclick
- Deleting all traces of SuperSU and SuperSU Pro


*NOTE* - FOR ALREADY ROOTED PHONES

For those who already have root and want to update you need first uninstall all app that they are depended from root then apply in recovery mode the universal_gb_unroot_v3.zip after that enter again inrecovery mode and apply the universal_gb_root_v19.zip
ဆက္ဖတ္ရန္>>>

Android & Infineon Tool SamsunG Free Tools Reset Phone Lock & Pattern Lock


Android & Infineon Tool SamsunG Free Tools

Reset Phone Lock & Pattern Lock


Download Link
ဆက္ဖတ္ရန္>>>

Wednesday, May 30, 2012

iOS 5 Myanmar Font + Keyboard For All..

iOS 5 နဲ႔ အထက္ iDevces မ်ားျဖစ္ၾကေသာ iPhone, iPod Touch, iPad 1,2 တို႔အတြက္ လုံးဝ အလုပ္လုပ္ေသာ ေဇာ္ဂ်ီ ျမန္မာလက္ကြက္ အသစ္ ရရွိပါေၾကာင္း သတင္းေကာင္း ပါးအပ္ပါတယ္။

ယခု iOS 5 for Zawgyi Keyboard ကို ေရးသားေပးသူကေတာ့ Developer "ကိုမိုးစက္" ျဖစ္ပါတယ္။ မည္သူပဲ ျဖစ္ျဖစ္ ျမန္မာလူမ်ိဳးမ်ား အတြက္ အစဥ္ႀကိဳးပမ္း အားထုတ္ေနၾကေသာ ျမန္မာ Developer အားလုံးကို အျမဲေလးစား ႀကိဳဆိုလၽွက္ပါ၊ တစ္လက္စထဲ အေနနဲ႔ မိတ္ေဆြမ်ားအားလုံးကို တိုက္တြန္းလိုတာက ျမန္မာ App မ်ားကို တတ္နိုင္ရင္ cracked version မသုံးပဲ ဝယ္ယူ သုံးစြဲျခင္းျဖင့္ ျမန္မာ Developer မ်ားရဲ့  ႀကိဳးစားအားထုတ္မွုကို ဂုဏ္ျပဳၾကပါလို ့ ကၽြန္ေတာ္ ေမတၱာရပ္ခံပါရေစ...

Installation Guide

1) Go to Cydia -> Sources -> Edit -> Add
2) http://cydia.macforus.com ဟု ရိုက္သြင္းပါ။
(Source) သြင္းထားၿပီးသူမ်ား Cydia ကို Update လုပ္ပါ။


ျမန္မာေဖာင့္ သြင္းရန္...

(Font Install လုပ္ၿပီးသူမ်ား ဤအဆင့္ကို ေက်ာ္လိုက္ပါ)

1) Cydia -> Sources -> Mac For Us Repo သို႔သြားပါ။
2) Zawgyi iOS 4.3 Font ကို Install လုပ္ပါ။

ျမန္မာ Keyboard သြင္းရန္...

1) Cydia -> Sources -> Mac For Us Repo သို႔သြားပါ။
2) MMKeyboard for iOS5 ကို Install လုပ္ပါ။
3) Restart Springboard


Keyboard Setup..

1) Go to Settings -> General -> Keyboard -> International Keyboards
2) Add New Keyboard -> Czech ကိုေရြးပါ။


အခုဆိုရင္ ျမန္မာစာမ်ားကို စိတ္တိုင္းက် ေပ်ာ္ရႊင္စြာ ရိုက္နိုင္ၾကပါၿပီ။
ဆက္ဖတ္ရန္>>>

iDevice Gamer မ်ားအတြက္ iap cracker


iap cracker ေလးကိုု သိတဲ့သူလည္း သိျပီးသားေနမွာပါ။ iPhone, iPad, iPod Touch ေတြမွာ Game ကစားရတာ သေဘာက်သူမ်ား iap cracker ေလးကိုု မိမိရဲ ့ Device မွာ install လုုပ္ထားသင့္ပါတယ္။ iap cracker ေလးရဲ ့သေဘာက တစ္ခ်ိုဳ ့ Game ေတြက iTunes မွာ Free ေပးထားေသာ္လည္း Gold, Cash တိုု ့ ကိုုဝယ္ျပီးမွကစားလိုု ့ေကာင္းပါတယ္။
ဥပမာေျပာရရင္ Contract Killer, Contract Killer Zombie, Blood & Glory တိုု ့လိုု Game ေတြမွာ Gold cash Rubies coins တိုု ့ကိုုဝယ္ျပီးမွ ေသနတ္၊ ဓား တိုု ့ကိုု update လုုပ္ႏိုင္မွ အနုုိင္ရတတ္ပါတယ္... ဘာလိုု ့ဝယ္မွာလဲ ပိုုက္ဆံကုုန္တာေပါ့။ အကယ္၍ အကုန္ခံႏိုင္လို ့ ဝယ္ခ်င္ရင္ေတာင္မွ Visa card ,Master card ရွိမွျဖစ္မွာေလ။ ကြ်န္ေတာ့္မွာေတာ့ ဘာ Card မွမရွိဘူး ဝယ္ခ်င္ရင္ ေတာ့ iap cracker Deb file ေလးနဲ ့ Free ပဲဝယ္မွာေပါ့။
iap cracker ကိုု install လုုပ္ဖိုု ့ အတြက္ Cydia ရဲ ့ Sources မွာ http://repo.insanelyi.com ကိုု Add အရင္လုုပ္ပါ၊ ၿပီးမွ iap cracker ေလး ကိုုinstall လုုပ္ပါ။ ေအာက္ေဖာ္ျပပါ list မ်ားကေတာ့ iap cracker နဲ ့ Free ဝယ္လိုု ့ရတဲ့ game စာရင္းတြပါ....


တစ္ျခား Game တစ္ခ်ိဳ ့လဲရနုုိင္ပါတယ္။ ရတဲ့ Game လဲရွိမယ္ မရတဲ့ Game ေတြလဲပဲ ရွိနုုိင္ပါတယ္။
ေနာက္တစ္ခုုလဲ ရွိပါေသးတယ္ အဲဒါကေတာ့ iap cracker နဲ ့ ဝယ္ျပီး deb file လုုပ္ထားတဲ့ cydia repo တစ္ခုုပါ။ http://idwaneo.org/repo ဒီ Repo ေလးနဲ ့ deb file အသံုုး ျပဳပံုုကို ဥပမာျပရရင္... Need for speed Shift 2 unleashed Game က မိမိ Devices မွာရွိေနမယ္ဆိုပါေတာ့၊ အရင္နည္းနည္းကစားလိုုက္ပါ၊ ဒါဆိုရင္ Game နဲ ့ ပက္သက္တဲ့ Documents ေတြက်လာပါမယ္။ ၿပီးေတာ့မွGame ကိုု လံုဝ ပိတ္လိုက္ပါ၊ Multitask ထဲမွာပါ ပိတ္ပစ္လိုက္ပါ။ ၿပီးေတာ့မွ အထက္ပါ Repo ထဲက shift2 money ကိုု crack ထားတဲ့ deb file ကိုုရွာျပီး install လုုပ္ပါ။ ၿပီးမွ Game ကိုုုျပန္ကစားၾကည့္လိုက္ပါ Game မွာ money 100.. ရေနတာကို ေတြ ့ရပါလိမ့္မယ္။

ကြ်န္ေတာ္သိထားေသာ နည္းလမ္း နည္းနည္းကိုု ေရႊညီအကိုုေတြကိုုေပးခ်င္လိုု ့ပါ။
သတိျပဳရန္ ။ ။ iap cracker နဲ ့crack ဖိုု ့က connection ေကာင္းဖို ့ အနည္းငယ္ေတာ့လိုုအပ္ပါတယ္.....။ 

ေရးသားသူ - ကိုေလး (noicenice)  
From www.moetagyar.info
ဆက္ဖတ္ရန္>>>

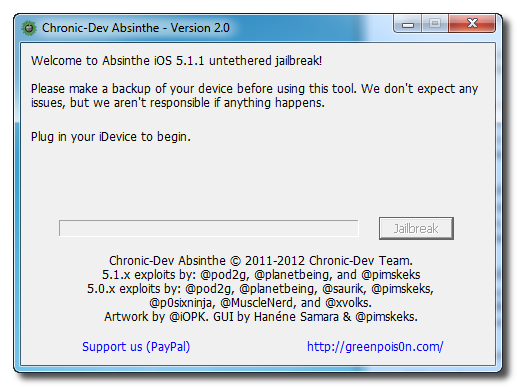
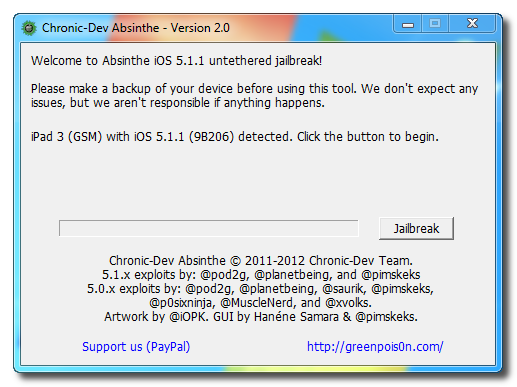
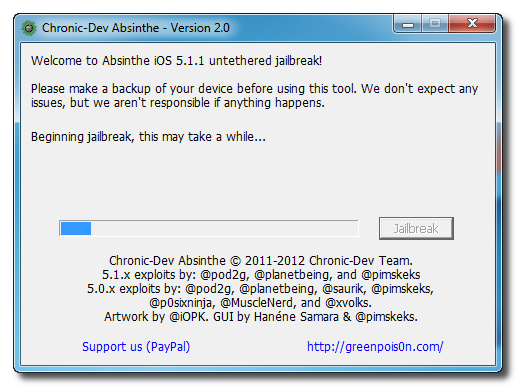
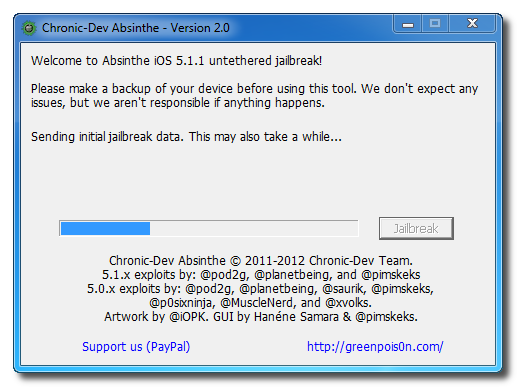
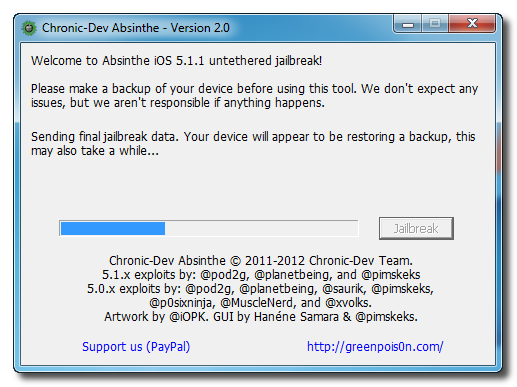
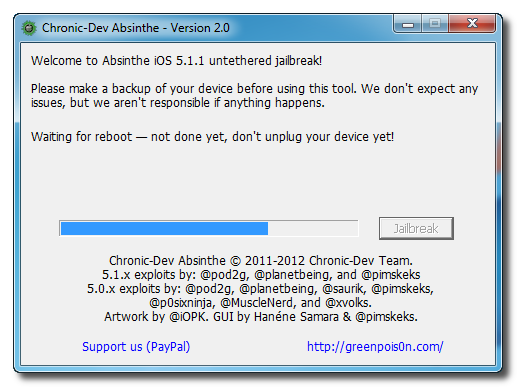
How to Jailbreak Your iPad Using Absinthe 2.0 (Windows) [5.1.1]

These are instructions on how to perform an untethered jailbreak of your iPad on iOS 5.1.1 using Absinthe for Windows.

Warning***: Before you continue make sure to do a backup of your device in iTunes as you may lose your Camera Roll during this process.


Step One
Download the latest version of Absinthe from here.

Step Two
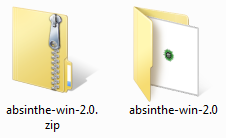
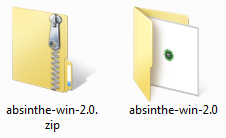
Extract the downloaded archive.


Step Three
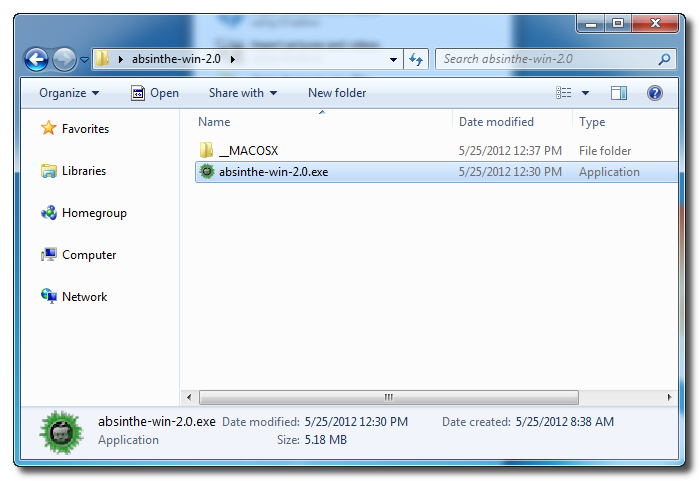
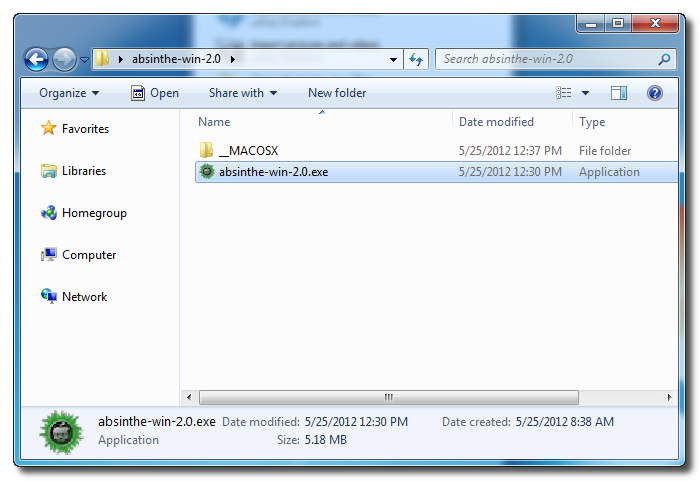
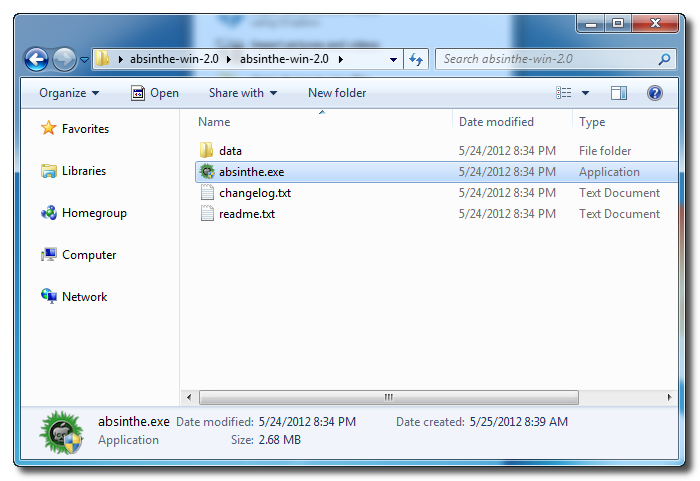
Double click the absinthe-win-2.0.exe file from the folder that was just extracted.


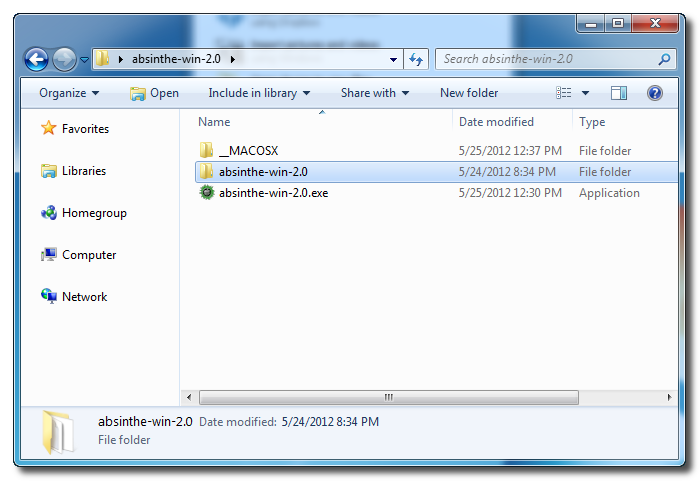
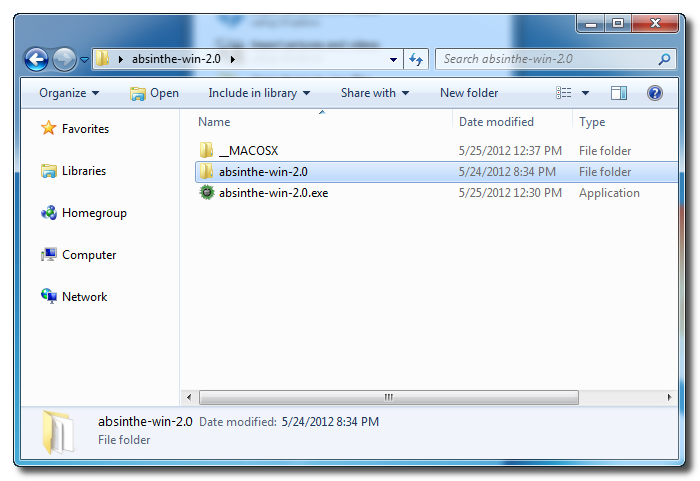
This will create a new folder called absinthe-win-2.0.


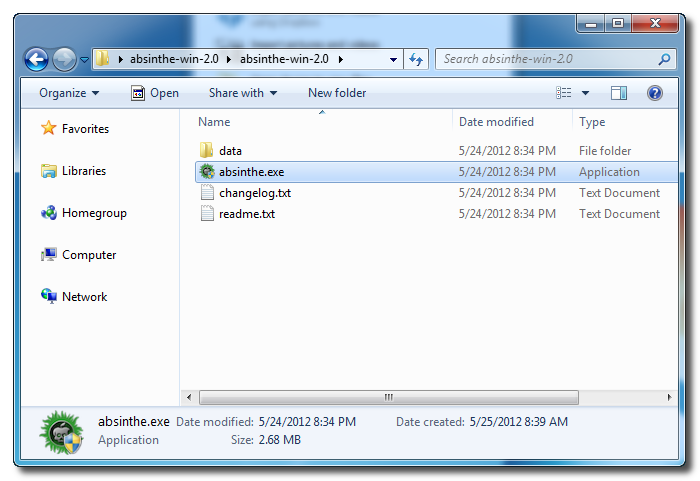
Open the newly created folder and launch absinthe.exe.


Step Three
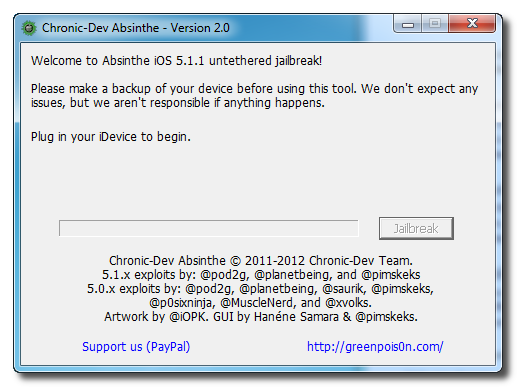
As prompted, connect your iPad to the computer via USB. Make sure to remove any passcodes or VPN settings you've previously set.


Step Four
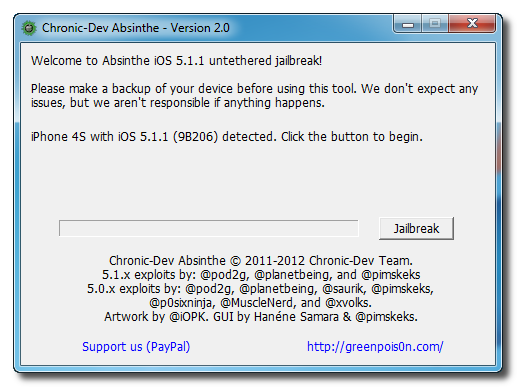
Click the Jailbreak button to begin


Step Five
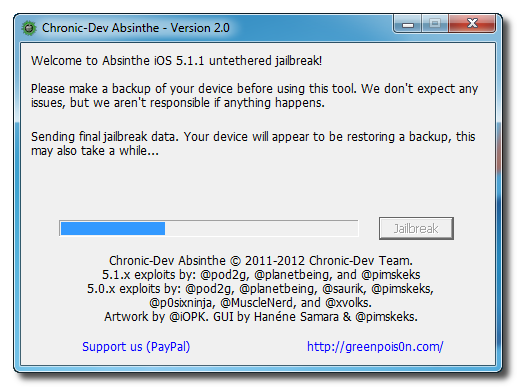
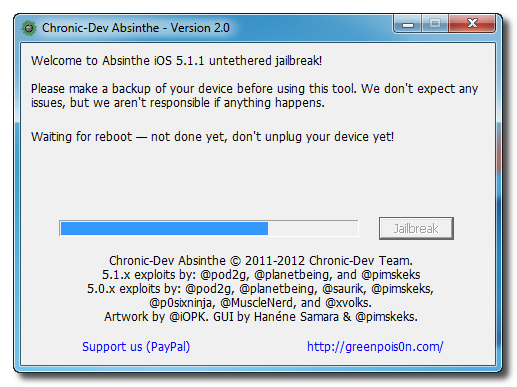
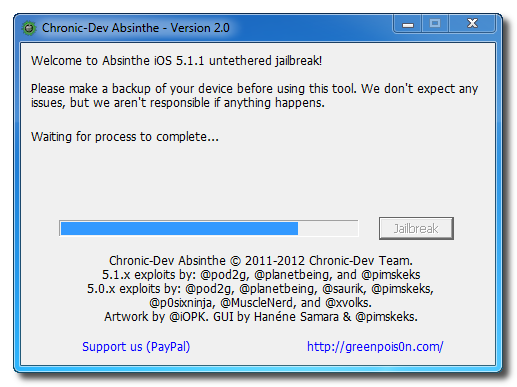
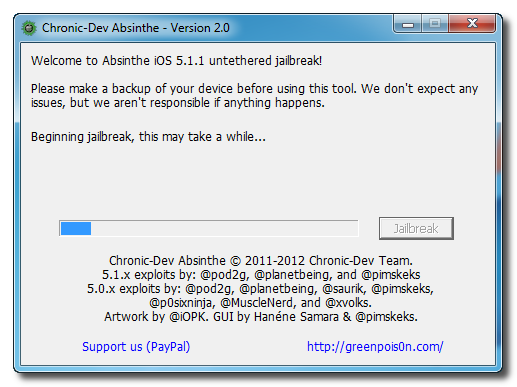
The application will take you through several steps to jailbreak including: beginning jailbreak, sending initial jailbreak data, sending final jailbreak data, waiting for reboot, and waiting for process to complete.


Step Six
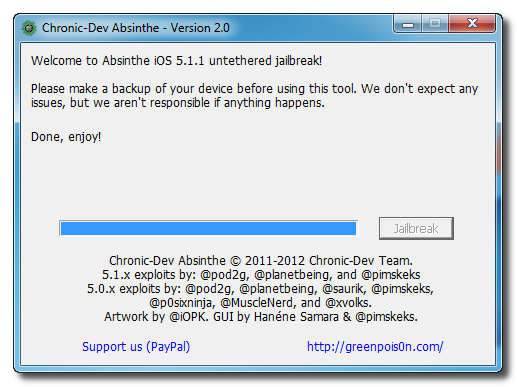
You will be informed that the jailbreak is 'Done'.


Step Seven
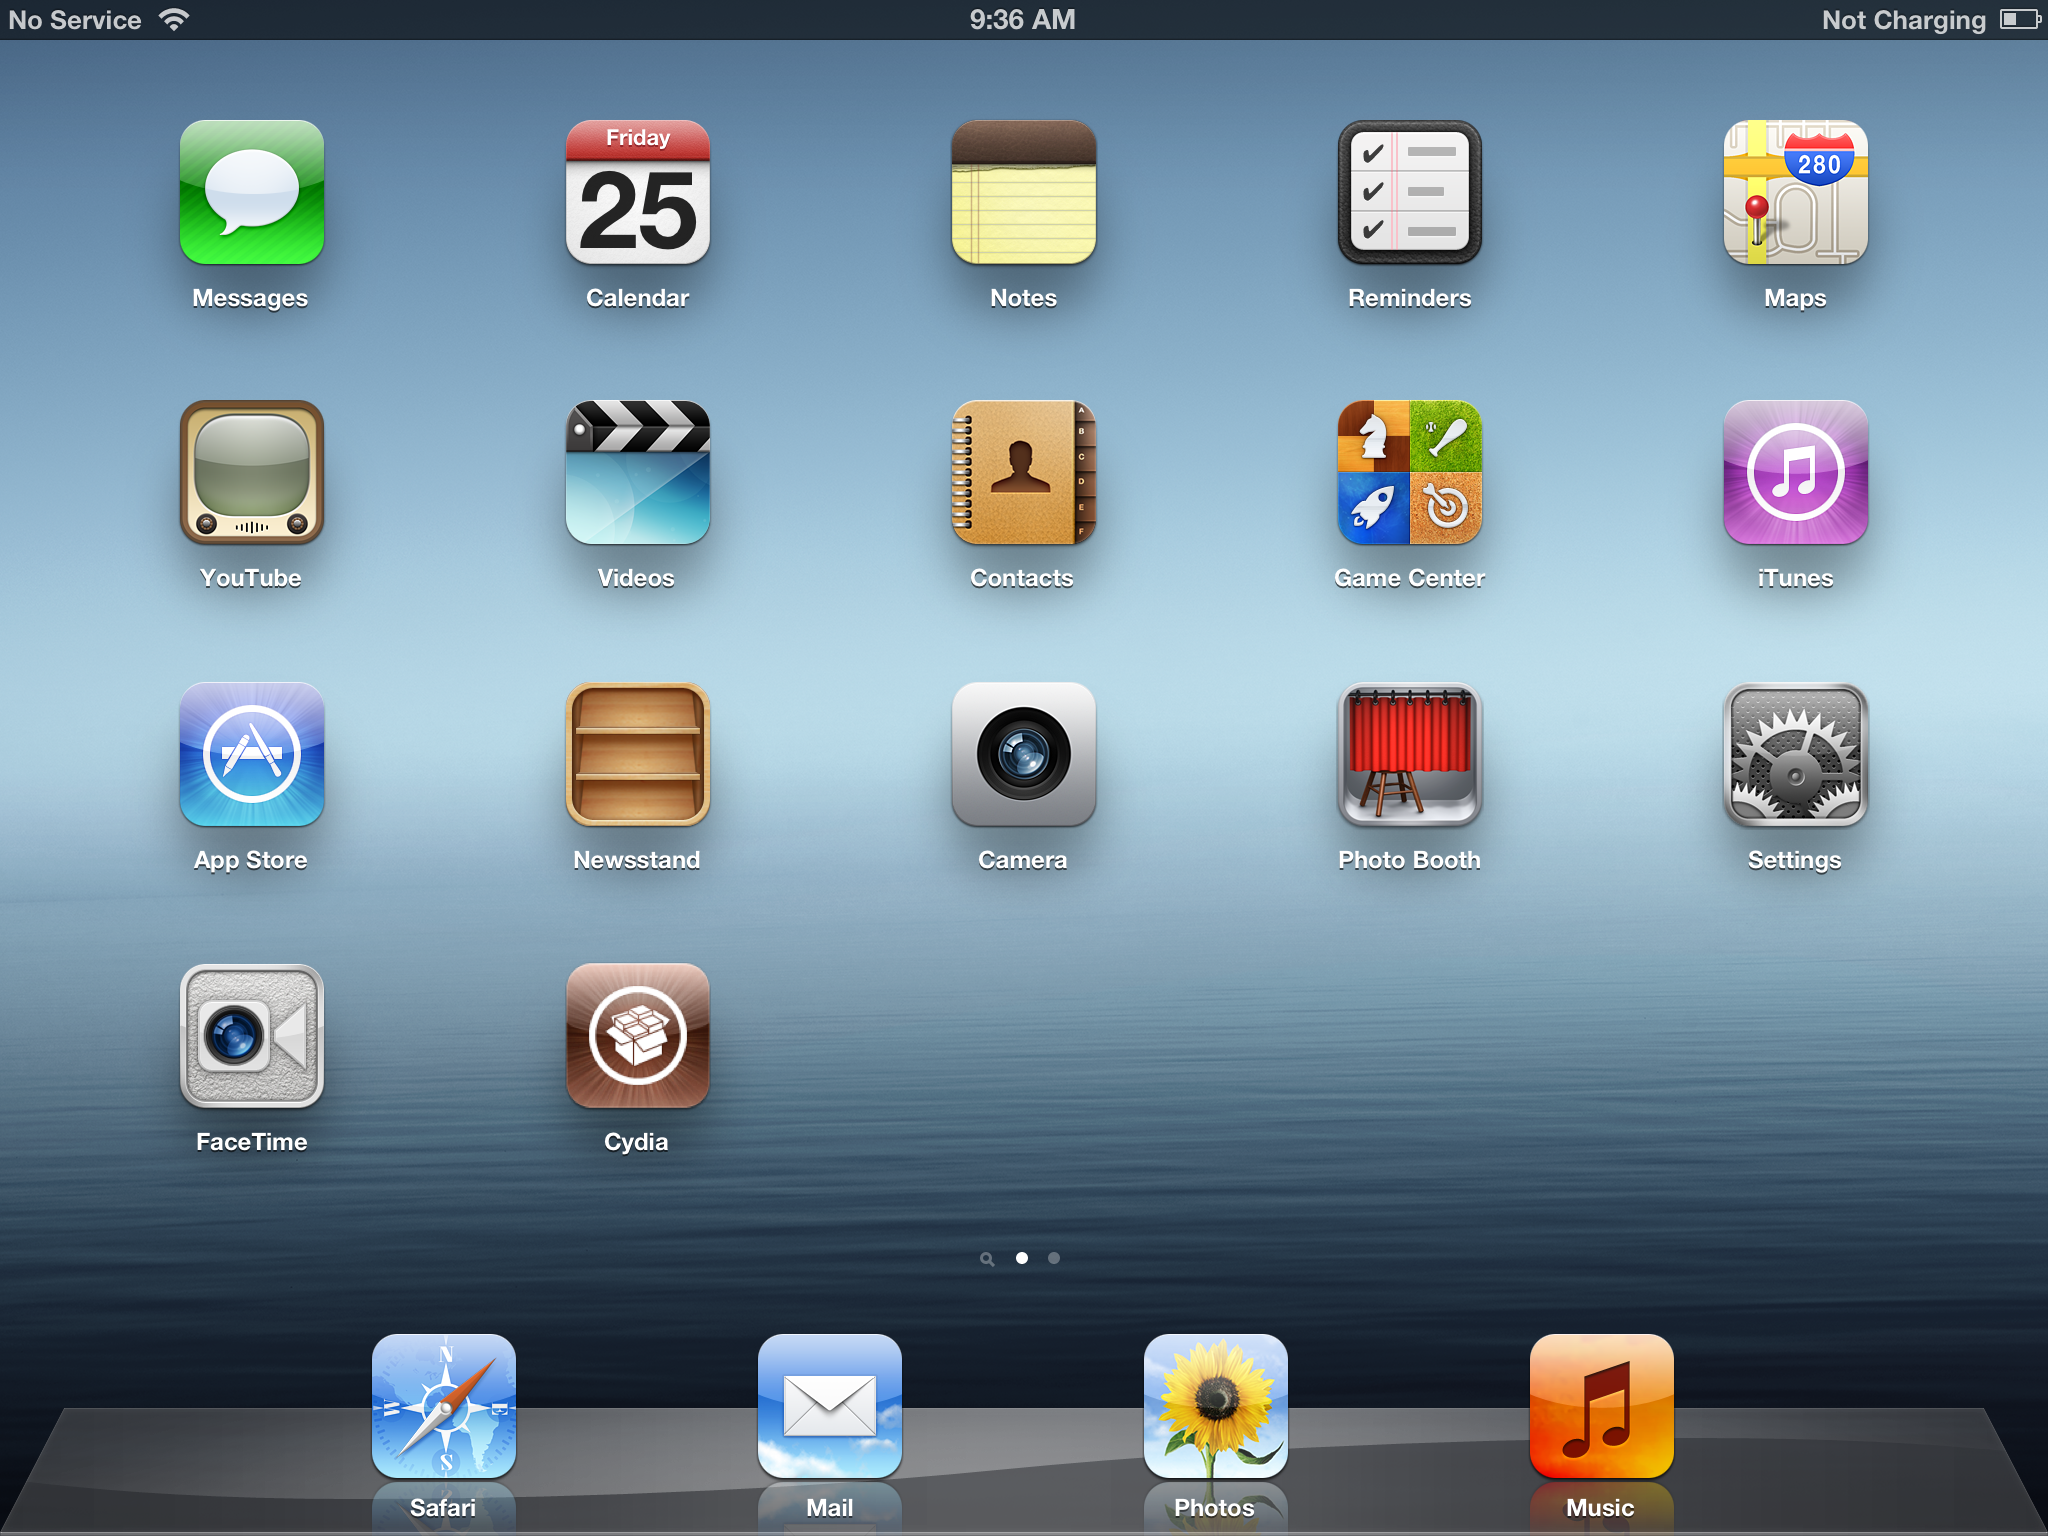
In a few moments you will notice Cydia appear on your Springboard!


***If you have any problems please retry the procedure on a device cleanly restored to iOS 5.1.1 (Remember to backup before restoring)***
ဆက္ဖတ္ရန္>>>

How to Jailbreak Your iPhone Using Absinthe 2.0 (Windows) [5.1.1]


These are instructions on how to perform an untethered jailbreak of your iPhone on iOS 5.1.1 using Absinthe for Windows.

Warning***: Before you continue make sure to do a backup of your device in iTunes as you may lose your Camera Roll during this process.


Step One
Download the latest version of Absinthe from here.

Step Two
Extract the downloaded archive.


Step Three
Double click the absinthe-win-2.0.exe file from the folder that was just extracted.


This will create a new folder called absinthe-win-2.0.


Open the newly created folder and launch absinthe.exe.


Step Three
As prompted, connect your iPhone to the computer via USB. Make sure to remove any passcodes or VPN settings you've previously set.


Step Four
Click the Jailbreak button to begin


Step Five
The application will take you through several steps to jailbreak including: beginning jailbreak, sending initial jailbreak data, sending final jailbreak data, waiting for reboot, and waiting for process to complete.


Step Six
You will be informed that the jailbreak is 'Done'.


Step Seven
In a few moments you will notice Cydia appear on your Springboard!


***If you have any problems please retry the procedure on a device cleanly restored to iOS 5.1.1 (Remember to backup before restoring)***

ဆက္ဖတ္ရန္>>>

Tuesday, May 29, 2012

Nokia ဖုန္းနဲ႕ ကြန္ျပဴတာ နဲ႕ ခ်ိတ္ၿပီး အင္တာနက္သံုးမယ္

 Nokia ဖုန္းနဲ႕ ကြန္ျပဴတာ နဲ႕ ခ်ိတ္ၿပီး အင္တာနက္သံုးမယ္

nokia-ovi-suite.en free download

  • Tested virus free - Safe software 
License: Free
Language:English 
OS:WinXP/Vista/7
 
 
ေဒါင္းထားတဲ႕ ဖိုင္ကို ထပ္ဖြင္႔လိုက္ ပါ။
softonic ဆိုၿပီးတက္လာလိမ္႔မယ္ ။
ဖိုင္တက္လာရင္ Accept လိုက္ရင္ေအာ္တိုေဒါင္း လိမ္႔မယ္ ။
ၿပီးရင္ ရလာတဲ႕ ဖိုင္ကိုမွ ဆက္သြင္းလိုက္ပါ ။အဲ႔ ဒါ ဆို OVI suit  သြင္းၿပီးပါၿပီ ။
Ovi suit ဖြင္႔ လိုက္ ပါ ။
ၿပီးရင္ဖုန္းကို ၾကိဳး နဲ႕ ကြန္ၿပဴတာနဲ႕ခ်ိတ္လိုက္ပါ ။
ၿပီးရင္ connet to internet ကို ႏိုပ္ လိုက္ပါ။သူေပးထားတဲ႕ ဆက္သြယ္ေရး ဟာေတြ မေရႊး နဲ႕ ။set menual ေရႊး ၿပီး name မွာ mptnet . apn မွာ လဲ mptnet . ထည္႔ လိုက္ ပါ ။
ၿပီးရင္ ok နိုပ္ လိုက္ ပါ ။ဖုန္းမွာ လိုင္းေအာက္ မွာ E ပံုေလး ေပၚလာပါမယ္ ။ ကြန္ၿပဴ တာ မွာ စတင္သံုးလို႕ ရပါၿပီ  ။

www.mobilehouse.co.nr
ဆက္ဖတ္ရန္>>>

Sunday, May 27, 2012

How To Root Galaxy S III


Most of you looking to get your hands on Samsung’s latest Galaxy S III smartphone will still be waiting, but courtesy of the intuitive folks over at XDA, it’s already been rooted. As was the case with the Galaxy S, S II and the larger-than-life Galaxy Note, it doesn’t have a locked bootloader, so the task of acquiring root was automatically that tidbit easier.
Samsung could have made it difficult for the hackers and devs to get into the Android innards, but have done the community a real service by shipping the device with an unlocked bootloader. Many OEMs love to play hard-ball, but the Korean company doesn’t seem altogether bothered with what users do with a device once it’s been paid for – as it should be.
GALAXY-S-III-Product-Image-3_B
While, as stated, we don’t reckon many of you will be in possession of a Galaxy S III just yet, it’s good to have the information out there so you can get a rough idea of the steps involved when you finally do get your paws on the Samsung’s first quad-core effort.
As usual, follow at your own risk. This tutorial is posted for information purposes only.
Step 1: Download the insecure kernel (based on the XX NEE ALE8 firmware) from Chainfire.
Step 2: Download ODIN 1.85, which we’ll be using to flash the insecure kernel.
Step 3: Once you’ve download both, extract using the archiving tool of your choice. I use WinRar, but if you’ve done this before, you’ll probably have your utility of choice already installed.
Step 4: After extracting the kernel, you’ll be left with a .tar file.
Step 5: Place your device into Download Mode by pressing and holding the Volume Down + Power / Lock buttons simultaneously, and pressing Volume Up when prompted.
Step 6: Run ODIN, connect your device to your PC via USB, and within ODIN, click on PDA and select the .tar file you extracted from the insecure kernel.
Step 7: Click Start and the flashing process will begin.
Step 8: Now you will need to "upgrade," as it were, from insecure to full root. To do this, you’ll need to boot your Galaxy S III, and enable USB Debugging by browsing to Settings > Applications > Development.
Step 9: Your insecure root allows adb root commands, but won’t enable your apps to get superuser access; thus, you’ll need to install SuperSU.
Step 10: Download the sgs3-root-install.zip file [XDA Developers link], which contains SuperSU v0.89, and extract it.
Step 11: With adb running, double-click the install.bat, and after a reboot, your Samsung Galaxy S III will be fully rooted!
ဆက္ဖတ္ရန္>>>

Superboot (huawei )

super root နဲ႔ အတူတူ ပါပဲ
fastboot ေခၚ ၿပီး လုပ္ရတာ ပါ ပဲ ။

download here

APPLY THIS AT YOUR OWN RISK!

Superboot (tested with U8110V100R001C85B214SP05 and U8110V100R001C85B214SP06) - DOWNLOAD (MediaFire Pro) - MD5: d92360bfc6a98b03ad6d325a134bfe1b
ဆက္ဖတ္ရန္>>>