
Mobile House မန္ဘာ မ်ား ေက်းဇူး ၿပဳ ၿပီး www.mobilehouse.co.nr မွ တိုက္ ရိုက္ ၀င္ေပး ပါ ရန္ ႏွင္႔ အသစ္ တင္ သမွ် ကို သိရွိ ေစရန္
https://www.facebook.com/MobileHouseServiceCentre
မွာ Like လုပ္ ေပး ၾက ပါ ....

Saturday, August 18, 2012

5 Reasons Why You Shouldn’t Root Your Android Phone

Is rooting your Android phone bad? Here we’ll give 5 compelling reasons to not root Android
  • Introduction

    android froyo
    We’ve recently covered the five compelling reasons to root your Android phone, but there are a few arguments that can be made against rooting your device. While it is true that there are some incredible apps only for root users, there are some excellent substitutes for most of them that do almost the same thing.
  • Rooting Breaks the Warranty

    The main argument against rooting or seriously modifying your phone or device, excluding apps found in the Android Market, is the fact that it voids your warranty. So if you happen to brick your phone (see reason #2 below) or for whatever reason need to bring it in for service, you will be sorry out of luck as long as your phone is rooted. The good news is that the rooting process is fully reversible and your provider or the manufacturer will have no idea it was ever rooted!
  • Bricking Potential

    Rooting a phone can potentially be risky if you are not familiar with the phone and the rooting process. When rooting, you should carefully follow the instructions for your specific phone and operating system (OS) version. If done properly, you should not have any problems. Should any problems arise and you brick your phone (completely locks up), you could try returning it to the store, but more likely your only recourse will be to turn to the internet and specifically the XDA Forums for help.
  • Lose Over the Air (OTA) Updates

    When your phone is rooted, it is freed from the service provider. It can no longer receive updates OTA without losing root access. This is not necessarily such a bad thing, but means that any future updates will have to be done by you installing a new ROM when the latest Android OS is released.
  • Not Entirely Necessary for an Enjoyable Experience

    The latest generation of Android phones are just incredible. They have come a long way from the first T-Mobile G1, the original “Google Phone.” These new phones are fast and run the latest OS (2.2 “Froyo”). It used to be that rooted users gained exclusive features only accessible on unreleased OSes like Donut, Éclair, and Froyo. But as Android has evolved, more of these features are being adopted and everyone has benefited. Things like multi touch, improved performance, and enhanced apps are now widely available. Rooted users though will continue to have an edge, staying ahead of the curve for the foreseeable future.
  • Not for the Faint of Heart

    Lastly, it must be said that the entire rooting process and having a rooted device is not a one-button step. It is an ongoing process as outlined above. Once rooted though, you will have the freedom to do whatever you want with your phone! And as of July 2010, congress has declared that rooting and unlocking your phone is definitely legal!
    It can be an addicting process since you will always feel the need to tweak your phone. If you have decided to root your phone, be sure to check out our list of the best apps for root users!

Rooting Your Android Phone

In this two part series we weigh the pros and cons on rooting your Android phone or device to see if the root process is really worthwhile.
ဆက္ဖတ္ရန္>>>

5 Reasons Why You Should Root Your Android Phone

Why should I root my Android phone? We offer up five reasons why you should unlock your phone right now with root!
  • Introduction - What is Rooting?

    google android logo One of the great benefits of your Google Android smartphone is the ability to install apps and customize it to your heart's content. Out of the box, every Android phone has countless features, but hidden beneath the surface are loads of features waiting to be unlocked and put to good use! While Android is an open source endeavor, you still do not have full control over your device. Rooting your Android phone or device is a lot like jailbreaking an Apple iPhone or iPad. It gives you root access, for total control over your phone, freeing you from any restrictions your carrier, Google, or handset manufacturer may have placed on it. It is perfectly legal and fully reversible should you need to use the warranty. With this article, you will see that the benefits of rooting greatly outweigh the potential disadvantages. Once rooted, there's just no need to go back!
  • 1. Unlock Features, Customizations, and Apps

    The best reason to root are the amazing apps for root users! Rooting your phone is like getting an entirely new phone. Before rooting my phone, I was stuck on an old operating system (OS) and the phone soon felt sluggish. After rooting and installing CyanogenMod, it is swift and fun to use again. I had access to multitouch, a fast refined browser, dialer, and home screen. Rooting unlocks a whole host of features and abilities outlined below.


  • 2. Latest Android OS's

    The latest Android OS is Froyo, version 2.2. For a multitude of reasons and the many different Android phones on the market, not every phone has been updated to the latest OS and some users have been told that their phones are not "compatible." Why should only a select few have all the fun with Google's latest release of delectable dessert-named OS's? Rooted users have a choice of installing any current and future OS's by installing custom-tailored ROMs for their phone (see #3).
    What's next for the good folks at Google? Version 3.0, Gingerbread! It should bring many exciting features and should hit by year's end!
  • Customized ROMs

    cyanogen logo Browsing the XDA forums, you will find that it is conveniently divided up by phone model. For the most popular Android phones, you will find dozens of ROMs specifically designed for your phone. Some are stripped down versions of the latest OS designed for speed, while others add useful features out of the box. One of the most popular and original ROMs is CyanogenMod. It is currently available on phones like the Nexus One, Motorola Droid, HTC EVO, Droid Incredible, Hero, Dream, Mytouch 3G, G1, and a few others. I personally use Cyanogen and have found it to be the perfect blend of speed, customization, and usefulness.
    You can use ROM managers to test different ROMs and quickly backup and restore your phone.
  • 4. Faster, More Productive Phone

    Customized ROMs as described above are tweaked for your specific phone to give it the best performance. ROMs are constantly being updated on a weekly or monthly basis, unlike official Android releases which come maybe twice a year.
    Rooted phones have control over the internal CPU of the phone which can be overclocked and tweaked to boost your phone's performance. It may affect the battery life slightly, but you should still manage a full day's charge easily on a properly functioning phone.
  • 5. Wi-Fi Tethering

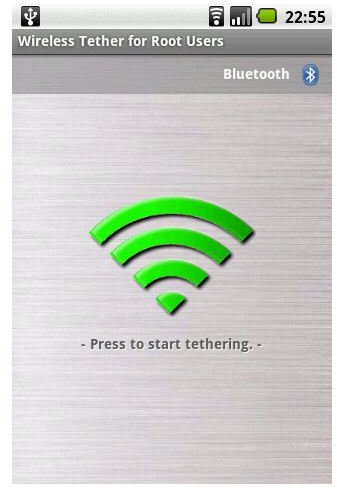
    wireless tether for root users For me, this was one of the most attractive features to rooting my own phone. Coming from a BlackBerry, where you could easily configure the phone as a modem and tether it over USB right out of the box, I wanted to be able to do the same with my Android phone, only wirelessly. With the app "Wireless Tether for Root," you will be able to accomplish just this and turn your phone into a mobile hotspot Mifi-like device. With Wireless Tether, you will be able to securely set up a connection and connect to it wirelessly via your laptop or other internet device, including an iPod Touch.
  • So, Now What?

    Get Rooting! Head on over to one of our guides for the T-Mobile HTC G1, Motorola Droid X, or HTC Hero. Better yet, jump on over to our newest Android Rooting Guide for easy 1-click solutions and custom ROMs like CyanogenMod!
    If you have any questions, let me know in the comments!
ဆက္ဖတ္ရန္>>>

Saturday, August 11, 2012

How to install ClockworkMod Touch Recovery 6.0.1.0 on Galaxy S3 I9300


If you’ve been hanging around the Android community long enough, you’ll know that you can experience more than just what you get out of the box. There’s a whole world of customization waiting for you, but you’ll need to equip your phone properly to be able to take them on. The tool that you need is custom recovery, specifically ClockworkMod Recovery.
This custom recovery has recently taken a step up to Version 6.0 but what does this huge upgrade mean? For those of you who hesitate to make a NANDroid backup every time you flash a custom ROM because you’re afraid of eating up your precious memory, ClockworkMod Recovery will no longer accept your excuses. Backups are not only 4 to 5 times faster than before, but backups are also smaller at around 15-20 MB in size, thanks to Koushik Dutta, the developer of ClockworkMod Recovery.
Version 6.0 isn’t just any regular ClockworkMod Recovery; your Volume, Power, and Home buttons can finally take a break because this is ClockworkMod Touch Recovery. You can easily backup your ROMs and flash customizations using your fingers.
If you want to learn how to install ClockworkMod Touch Recovery 6.0.1.0 on Galaxy S3 I9300, check out the rest of this guide.

Warning

  • The instructions in this guide are intended for use with the Samsung Galaxy S3, model numberGT-I9300. Applying these instructions on another device or model may produce undesired outcomes.
  • The information in this guide is provided for instructional and educational purposes only. There is no guarantee that these instructions will work under your specific and unique circumstances.
  • Use these instructions at your own risk. We shall not hold any responsibility or liability for whatever happens to you or your device arising from your use of the info in this guide.
  • Read and understand the whole guide first before actually performing the instructions.

Requirements

  • Samsung Galaxy S3 GT-I9300
  • A Windows PC
  • Handset USB drivers installed on the PC. You may install the drivers by installing Samsung Kies.
  • Enable USB debugging on your handset.
  • Disable antivirus, firewall, and other security software. Also disable Samsung Kies and other software that accesses your phone. Such software can interfere with the procedure in this guide.
  • Download these to your computer:
  • Backup all personal data on your phone to make sure you have a copy of your personal data (e.g., contacts, SMS, MMS, Internet settings, Wi-Fi passwords, and the like) in case the procedure in this guide erases such data.

Instructions

  1. Extract Odin3_v3.04.zip to get the Odin3 v3.04.exe file.
  2. Turn off your Galaxy S3.
  3. Boot the phone into Download Mode by pressing and holding down the Volume Down, Home, and Power keys until the screen turns on. Press Volume Up to continue into Download Mode.
  4. Double-click on Odin3 v3.04.exe to launch it.
  5. Connect your Galaxy S3 to your computer. Once Odin recognizes your phone, you should see an “Added!” message in Odin’s lower left message box.
    • If you do not receive this message, make sure that you have installed the drivers properly. You can also use the USB ports on the back of your CPU.
  6. In Odin, click the PDA button. Browse for the recovery-clockwork-touch-6.0.1.0-i9300.tar file and select it.
  7. Important: Do not make any other changes in Odin. Make sure that that the “Re-Partition” option box is not checked.
  8. Click the Start button in Odin to start flashing the recovery image on your Galaxy S3.
  9. Once the flashing is done, you’ll see a PASS message on the Odin window and your phone will automatically reboot.
  10. If Odin gets stuck and doesn’t seem to be doing anything, or if you get a FAIL message, do the following:
    • Disconnect your phone from your computer.
    • Close Odin.
    • Remove the phone’s battery for a few seconds.
    • Re-insert it.
    • Repeat from step 3.
  11. Once you see the Samsung logo, you can disconnect your phone from your computer.
  12. You can access ClockworkMod Touch Recovery by shutting off your phone and holding down the Home and Volume Up buttons for about 5 seconds.
Congratulations! You now have ClockworkMod Touch Recovery 6.0.1.0 on your Samsung Galaxy S3 GT-I9300. Give those physical buttons a rest and simply tap your way through flashing custom ROMs, mods, tweaks, and hacks on your device.

ဆက္ဖတ္ရန္>>>

How to upgrade the Galaxy S2 I9100G to Android 4.1.1 Jelly Bean via CyanogenMod 10

Owners of the Samsung Galaxy S2 GT-I9100G are in for a treat, as Android 4.1.1 Jelly Bean is heading its way, unofficially of course. Jelly Bean was possible, thanks to the efforts of XDA Developers member codeworkx who has just released the said update based on the official build of CyanogenMod 10 (CM10).  The modified version of Jelly Bean brings a lot of enhancements to the table, such as a smoother interface, better keyboard, offline voice recognition, search functionality, and an improved notification area.
With that said, CM10 is a great ROM for users who are seriously looking for an update. Don’t be surprised if you find some minor bugs and disabled features in the ROM, as CM10 is still a work in progress that serves as a preview of the upcoming versions. But, for the most part, the ROM is stable enough for everyday use.
Continue reading the rest of this guide to learn how to upgrade the Galaxy S2 I9100G to Android 4.1.1 Jelly Bean via CyanogenMod 10.

Warning

  • The instructions in this guide are intended for use with the Samsung Galaxy S2, model number GT-I9100G. Applying these instructions on another device or model may produce undesired outcomes.
  • The information in this guide is provided for instructional and educational purposes only. There is no guarantee that these instructions will work under your specific and unique circumstances.
  • Use these instructions at your own risk. We shall not hold any responsibility or liability for whatever happens to you or your device arising from your use of the info in this guide.
  • Read and understand the whole guide first before actually performing the instructions.

Requirements

  • Samsung Galaxy S2 GT-I9100G with ClockworkMod Recovery installed and running stock Android 4.0 Ice Cream Sandwich ROM
  • Download the following files and save them to your computer:
  • Backup all personal data on your phone to make sure you have a copy of your personal data (e.g., contacts, SMS, MMS, Internet settings, Wi-Fi passwords, and the like) in case the procedure in this guide erases such data.

Instructions

  1. Copy the downloaded ZIP files and place them on your phone’s internal SD card.
  2. Switch off your phone.
  3. Boot into ClockworkMod Recovery. You can do this by pressing and holding down the Volume Up, Home, and Power buttons until recovery boots.
    • NOTE: Use the Volume keys to navigate and the Power button to select an option in Recovery Mode.
  4. Select Wipe data/factory reset, then select Yes on the screen that follows to confirm data wipe.
  5. Select Install ZIP from SD card.
  6. Select Choose ZIP from SD card, then browse for the downloaded CM10 ROM file. Confirm the installation by selecting Yes on the next screen. It may take 5-10 minutes for your phone to finish with the installation process.
  7. Once complete, go back to the main menu and flash gapps-jb-20120717-signed.zipin the same manner as in steps 5 and 6.
  8. Head back to the main recovery menu by selecting Go back.
  9. Reboot your phone by selecting Reboot system now. It may take a couple of minutes as this is the first time your phone will boot into Jelly Bean.
Congratulations! You have successfully installed Android 4.1.1 Jelly Bean on your Samsung Galaxy S2 GT-I9100G via CyanogenMod 10.
ဆက္ဖတ္ရန္>>>

How to upgrade the Galaxy Ace S5830 to Android 4.1.1 Jelly Bean via CyanogenMod 10


Originally, the Samsung Galaxy Ace GT-S5830 officially ran Android 2.3 Gingerbread. With the help of independent developers, custom ROMs were made to give the Android 4.0 Ice Cream Sandwich’s sweetness to the mobile phone. Also through custom ROMs, the Galaxy Ace is able run the latest chewy treat, Android 4.1.1 Jelly Bean.
XDA Developers member Maclaw was able to build a CyanogenMod 10 custom ROM for the Samsung Galaxy Ace GT-S5830. Flashing this ROM will let you enjoy Android 4.1.1 Jelly Bean on your mobile phone. The ROM is currently being developed.  According to the dev, the latest build (beta 1) still has issues with the camera and the proximity sensor.
If these bugs are not an issue, read on to learn how to upgrade the Galaxy Ace S5830 to Android 4.1.1 Jelly Bean via CyanogenMod 10.

Warning

  • The instructions in this guide are intended for use with the Samsung Galaxy Ace, model number GT-S5830. Applying these instructions on another device or model may produce undesired outcomes.
  • The information in this guide is provided for instructional and educational purposes only. There is no guarantee that these instructions will work under your specific and unique circumstances.
  • Use these instructions at your own risk. We shall not hold any responsibility or liability for whatever happens to you or your device arising from your use of the info in this guide.
  • Read and understand the whole guide first before actually performing the instructions.

Requirements

Instructions

  1. Copy the CyanogenMod 10 ROM file to your phone’s internal SD card.
  2. Switch off your mobile phone
  3. Reboot your phone into ClockworkMod Recovery Mode. You can do that by pressing and holding the Home button (middle key) and Power button until recovery boots.
  4. Create a NANDroid backup of your current ROM in case something goes wrong with the installation process. From the main recovery menu, select Backup and Restore and select Backup on the next screen. Wait until recovery finishes the backup process.
  5. Go back to the main menu and perform a full wipe:
    • Select Wipe data/factory reset and confirm the action on the next screen.
    • Select Wipe cache partition and confirm the action on the next screen.
    • Go back to the main menu and select Advanced. From there, select Wipe Dalvik cacheand confirm the action on the next screen.
  6. Return to the main menu and select Install ZIP from SD card.
  7. Select Choose ZIP from SD cardand select the CM10 ROM ZIP file.Confirm the action on the next screen to flash the ROM to your mobile phone. Wait until the flashing procedures completes
  8. Go back to the main menu and select Reboot system nowto restart your phone.
Hooray! You can now enjoy Android 4.1.1 Jelly Bean on your Samsung Galaxy Ace GT-S5830. Enjoy the smooth performance of Project Butter, a new search bar, enhance notification menu, and many more with the latest Android OS on your mobile phone.

ဆက္ဖတ္ရန္>>>

How to upgrade the Galaxy S I9000 to Android 4.1.1 Jelly Bean via AOKP ROM

Galaxy S I9000 to Android 4.1.1 Jelly Bean


Warning

  • The instructions in this guide are intended for use with the Samsung Galaxy S, model number GT-I9000. Applying these instructions on another device or model may produce undesired outcomes.
  • The information in this guide is provided for instructional and educational purposes only. There is no guarantee that these instructions will work under your specific and unique circumstances.
  • Use these instructions at your own risk. We shall not hold any responsibility or liability for whatever happens to you or your device arising from your use of the info in this guide.
  • Read and understand the whole guide first before actually performing the instructions.

Requirements

  • Samsung Galaxy S GT-I9000 with ClockworkMod Recovery
  • Download the Galaxy S AOKP ROM (aokp_galaxysmtd-eng.nasif.zip, 146.36 MB) to your computer.
  • Backup all personal data on your phone to make sure you have a copy of your personal data (e.g., contacts, SMS, MMS, Internet settings, Wi-Fi passwords, and the like) in case the procedure in this guide erases such data.

Instructions

  1. Copy the AOKP ROM ZIP file to your Galaxy S’s internal SD card
  2. Turn off your Galaxy S.
  3. Boot into Recovery Mode. You can do this by pressing and holding down the Volume Up, Home, and Power buttons. When the screen turns on, let go of all three buttons.
    • In Recovery, you can use the Volume keys to navigate and the Power button to select
  4. Make a NANDroid backup of your current ROM. Select Backup & Restore and select Backup.
  5. Select Wipe Data/Factory Reset and confirm the action on the next screen.
  6. Select Install ZIP from SD Card.
  7. Select Choose ZIP from SD Card and browse for the Galaxy S AOKP ROM ZIP file.
  8. After the Galaxy S AOKP ROM has finished installing, go to Advanced and select Fix Permissions.
  9. Select Go Back to return to the main menu.
  10. Select Reboot System Now.
Congratulations! You can finally taste Android 4.1.1 Jelly Bean on your Galaxy S GT-I9000 through this AOKP Jelly Bean port. Let us know what you think of it in a comment below.
ဆက္ဖတ္ရန္>>>

How to upgrade the HTC One X to Android 4.1.1 Jelly Bean via IceColdJelly AOKP custom ROM


Warning

  • The instructions in this guide are intended for use with the HTC One X. Applying these instructions on another device or model may produce undesired outcomes.
  • The information in this guide is provided for instructional and educational purposes only. There is no guarantee that these instructions will work under your specific and unique circumstances.
  • Use these instructions at your own risk. We shall not hold any responsibility or liability for whatever happens to you or your device arising from your use of the info in this guide.
  • Read and understand the whole guide first before actually performing the instructions.

Requirements

Instructions

  1. Extract the Fastboot package ZIP file into a folder on your computer.
  2. Copy the the ROM and the GApps package to your phone’s SD card.
  3. Open the IceColdJelly AOKP ROM ZIP file and look for the boot.img file. Extract the file and place it in the folder where you extracted the Fastboot files.
  4. Switch off your mobile phone.
  5. Reboot your phone into Bootloader Mode. You can do this by pressing and holding the Volume Down key and Power button until bootloader boots.
    • NOTE: While in Bootloader Mode, use the Volume keys to navigate and the Power button to select an option.
  6. Highlight Fastbootand select it to boot into Fastboot Mode.
  7. Connect your phone to the computer via USB cable. The bootloader screen should say “FASTBOOT USB.”
  8. On your computer, go to the extraction folder and click the flash-boot-windows.bat file. This will flash the kernel to your mobile phone.
  9. You will see a command prompt with an “OKAY/finished” message once the flashing the boot image is done.
  10. On your phone, select Bootloaderto go back to the main bootloader menu.
  11. Select Recoveryto boot into ClockworkMod Recovery.
  12. Perform a full wipe (you can skip this step if you are updating from a previous build of IceColdJelly AOKP ROM):
    • Select Wipe data/factory reset and confirm the action on the next screen.
    • Select Wipe cache partitionand confirm the action on the next screen.
    • Go to the main menu and select Advanced.From there, select Wipe Dalvik cache and perform the action on the next screen.
  13. Go back to the main menu and select Install ZIP from SD card.
  14. Select Choose ZIP from SD cardand locate the aokp_endeavoru_Jul-30-12-V0.4.zipfile. 
  15. Go back and flash the Jelly Bean GApps package in the same manner as in steps 13 and 14.
  16. Return to the main menu and select Reboot system now to restart your mobile phone.
Congratulations! You have successfully upgraded your HTC One X to Android 4.1.1 Jelly Bean by flashing the IceColdJelly AOKP ROM.

ဆက္ဖတ္ရန္>>>

HTC Desire HD G10 Jelly Bean 4.1 trial version beta10

HTC Desire HD G10 Jelly Bean 4.1 trial version beta10

Author: randomblame
ROM size: 146.46MB
Android version: 4.1.1
UI type: Android native
Suitable models: HTC Desire HD (G10)
Release date :2012 -08-06
Safety Tips: manual inspection (no plug-in virus-free and a dark button)
ထံုးစံ အတိုင္း အဆင္ေၿပ မေၿပ ေကာ႔မက္ ထားခဲ ေပး ေနာ္ ။ 

Overall Rating:

Downloads: 518


ROM introduced:

This is based on cm10 compiled from source Broken: stand on tethering bluetooth - works in a beta 7 Broken 8 Working: in. a beta camera - not perfect still buggy the Mic accelerometer audio bluetooth wifi - may not support some channels hw acceleration buttons lights gps gsm lots more in Quirks KANG cm10: the backlight sometimes remains on the device when you the lock - with a black screen just lit App incompatibilities: Vibra - use the latest version on playstore * This is It is unnofficial and an early the build and is not indicitave of a final, the release Do not expect any form of support from anyone *. PLEASE REPORT ALL PROBLEMS WITH LOGS AND A THOUROUGH the DESCRIPTION. OF THE PROBLEM!!! * FULL WIPE the FIRST - Do not complain about bootloops if you do not GOOGLE APPS ARE NOT INCLUDED. PLEASE FLASH THE GOOGLE APPS PACKAGE SEPERATELY IT IS LINKED NEAR THE BOTTOM OF THIS POST. work: camera - not perfect, or BUG microphone accelerometer audio Bluetooth WIFI - may not support hardware acceleration ofsome channels button lights GPS GSM more work but normal: when you lock the device backlight and sometimes remain applications are not compatible:Vibration - using the latest version of the Play Store * KANG CM10. The it is unnofficial and earlier versions, and no one final version indicitave of. Do not count on support of any kind to any person. * Please report log and description of the problem THOUROUGH all your questions! * Wipe - do not complain if you do not separate about bootloops Google application services "does not include the Google Apps package, the FLASH
 
ဆက္ဖတ္ရန္>>>

Galaxy S III Jelly Bean CM10 Android 4.1.1

Galaxy S III Jelly Bean CM10 Android 4.1.1

ROM size:152.03MB
Android version:4.1.1
UI :Android
model Galaxy S III (i9300)

ဒါလဲ မစမ္း ရေသးပါ ဘူး ။စမ္းၿပီး ရင္ မရ တာေလး ေတြ ရွိ ရင္ ေကာ႔မက္ ထားခဲ႔ ေပး ၾကပါ ခင္ဗ်ာ ။


ROM

CyanogenMod is based on the Android Open Source Project with extra contributions from many people within the Android community. It can be used without any need to have any Google application installed. Linked below is a package that has come from another Android project that restore the Google parts. CyanogenMod does still include various hardware-specific code, which is also slowly being open-sourced anyway.

All the source code for CyanogenMod is available in the CyanogenMod Github repo. And if you would like to contribute to CyanogenMod, please visit outGerrit Code Review. You can also view the Changelog for a full list of changes & features.

Quote:

KNOWN ISSUES

- FMradio, heh!
- Camera is unstable, though taking pics should work
- Wi-Fi tethering is semi-broken

Quote:

TIPS & TRICKS

- Camera is now part of Gallery, that's why you might have two (because of Gapps)
- If you have no Camera icon in app drawer, remember you have a lockscreen
- If one camera app doesn't work, try the other one (if you have two)
- If it worked once then didn't work anymore, reboot

Quote:

HOW TO INSTALL

- Make sure to run CM9 or an AOSP-based ROM so you know you have everything already set-up
- Download the zip
- Download Gapps
- Install the update zip from recovery
- Install gapps
- WIPE DATA/FACTORY RESET
- Reboot

ဆက္ဖတ္ရန္>>>

Galaxy SII (i9100) CM10 Jelly Bean Android4.1.1

 Galaxy SII (i9100) CM10 Jelly Bean Android4.1.1

တင္ခ်င္တဲ႕ သူေတြရွိရင္ တင္ရေအာင္ တင္ေပး လိုက္ တယ္ ။
အဆင္ေၿပ မေၿပ ေကာ႔မက္ ေပးၿခင္း ၿဖင္႔ ကူညီ ပါ ။
ဘာေတြ မရလဲ ေတာ႔ မေရးေပးထား ပါ ဘူး ။မရတာ ရွိ ရင္ ေကာ႔မက္ ထားခဲ႔ ေပးခ်င္း ၿဖင္႔ ကူညီ ပါ ။

ကဲစမ္း ၿပီးပါ ၿပီ အကုန္အဆင္ ေၿပ ပါ တယ္ ။ၾကိဳက္ တဲ႕ version ကို root လုပ္ ၿပီး recovery ထဲ က ေန တင္ လိုက္ ပါ ။ အခန္႕ မသင္႔ Boot ေသတက္ တယ္ ေနာ္ ။ စက္နဲ႔ မကိုက္ ရင္ ၿဖစ္ တက္ ပါ တယ္ ။
  • Download the following to your computer:
  • Make sure your phone’s battery is charged up to 75% or more to avoid interruptions during the process.
  • Backup all personal data on your phone to make sure you have a copy of your personal data (e.g., contacts, SMS, MMS, Internet settings, Wi-Fi passwords, and the like) in case the procedure in this guide erases such data.

Instructions

  1. Copy the CM10 ROM and the GApps package to your phone’s internal SD card.
  2. Switch your phone off and boot into ClockworkMod Recovery. To do this, press and hold the Volume Up, Home, and Power buttons together until recovery boots.
  3. Select Install ZIP from SD card and select Choose ZIP from SD card. Locate the CM10 ROM file and select it. Confirming the action on the next screen will start installing the ROM to your phone.
  4. After installing the ROM, install the GApps (Google Apps) package in the same manner as in step 3.
  5. Once installation is done, select Go back.
  6. Select Wipe data/factory reset and confirm the action on the next screen.
  7. Return to the main recovery menu and choose Reboot system now. This will reboot your phone to the newly installed CM10 ROM.
Great job! Your Samsung Galaxy S2 GT-I9100 is now running CyanogenMod 10 based on Android 4.1.1 Jelly Bean. Any changes you’ve noticed after installing the ROM? Let us know your thoughts through commenting below.
ဆက္ဖတ္ရန္>>>